Introduction
Taking a break from Facebook can be a healthy choice for your digital wellbeing. Deactivating your account is a temporary measure that hides your profile and content from others, while preserving your data for when you decide to return. Below, you’ll find a clear, step-by-step guide for deactivating your Facebook account using a browser, Android, or iPhone, along with answers to the most common questions. This guide follows the structure and detail of the reference blog.
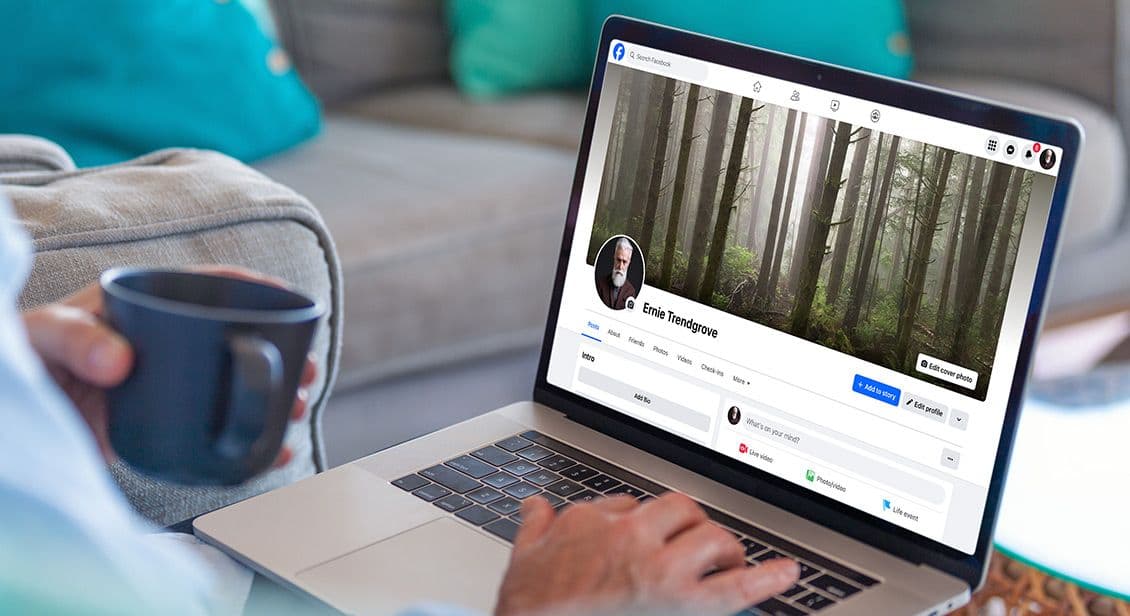
How to Deactivate or Disable Your Facebook Account?
Deactivating your Facebook account means your profile won’t be visible to others, but your information is saved, allowing you to reactivate at any time. This is ideal if you want a break without losing your content or connections. You can still use Messenger if you wish, and some information, like messages sent to friends, may remain visible to them.
Common reasons to deactivate your Facebook account include:
- Taking a break from social media to focus on other priorities.
Many users find that stepping away from Facebook helps them dedicate more time and attention to work, studies, or personal relationships, allowing them to achieve their goals without digital distractions. - Wanting more privacy or control over your online presence.
Deactivating your account can be a proactive way to safeguard your information and limit who can view your profile, posts, and activity, especially if you have concerns about data sharing or online visibility. - Reducing distractions and notifications.
The constant stream of updates, alerts, and messages on Facebook can interrupt your daily routine, so deactivation offers a way to regain focus and minimize interruptions from social media. - Managing your digital wellbeing without losing your account permanently.
If you feel overwhelmed by your online activity but don’t want to lose your photos, posts, or contacts, deactivation allows you to pause your presence while keeping all your data safe for when you wish to return.
Deactivation is a reversible process. You can return to Facebook at any time by simply logging back in, and your profile, photos, and posts will be restored. This flexibility makes deactivation a popular choice for those who want to step back without making a permanent decision.
Steps to Deactivate Your Facebook Account
Deactivate Your Facebook Account via Browser
- Go to facebook.com and log in to your Facebook account on your preferred web browser, then click your profile icon in the top right corner.
- Select “Settings & Privacy” from the dropdown menu, then click “Settings” to access your account options.
- In the left sidebar, click “Accounts Centre” to open the account management hub for all your Meta accounts.
- Under “Account Settings,” select “Personal details” to review your personal information.
- Click “Account ownership and control” to proceed to account management and security options.
- Choose “Deactivation or deletion,” then select your account and ensure “Deactivate account” is checked before continuing.
- Click “Continue,” enter your password if prompted, and follow the on-screen instructions to confirm deactivation; your profile will become invisible to others, but your data will be preserved for future reactivation.

Deactivate Your Facebook Account on Android
- Open the Facebook app and tap the three horizontal lines (menu) at the top right to access your settings.
- Scroll down and select “Settings & Privacy,” then tap “Settings” to enter your account management area.
- Tap “Accounts Centre” and select “Personal details” to manage your Meta account information.
- Tap “Account ownership and control” to find the deactivation option for your account.

5. Choose “Deactivation or deletion,” then select your account and ensure “Deactivate account” is selected before proceeding.

6. Tap “Continue,” enter your password if prompted, and follow the on-screen steps to confirm deactivation; your profile will be hidden, but you can reactivate at any time.

7. Decide if you want to keep using Messenger during deactivation and complete the process; Messenger can remain active if you choose.
Deactivate Your Facebook Account on iPhone
- Launch the Facebook app and tap the three horizontal lines at the bottom right to access the main menu.
- Tap “Settings & Privacy,” then select “Settings” to enter your account management area.

3. Tap “Accounts Centre” and choose “Personal details” to access your Meta account information.

4. Tap “Account ownership and control” to continue to the deactivation page.
5. Select “Deactivation or deletion,” then pick your account and ensure “Deactivate account” is chosen before proceeding.

6. Tap “Continue,” enter your password if prompted, and follow the instructions to finish deactivation; your profile will become invisible, but your data remains intact for reactivation.
7. Choose whether to keep using Messenger and confirm your choice; Messenger can remain available if you wish.
Understanding Key Differences: Deactivating vs. Deleting a Facebook Account
- Deactivation is temporary: Your profile is hidden, but your data is saved, and you can reactivate anytime by logging in.
- Some information remains visible: Messages you’ve sent to friends may still be visible even while your account is deactivated.
- Messenger remains available: You can still use Messenger if you choose to keep it active during deactivation.
- You retain access to your account: Simply log in again to restore your profile and content, picking up right where you left off.
Deactivation is ideal for those who want to take a break but may wish to return to Facebook in the future. Your friends won’t be notified, and your profile will not appear in searches or friend lists while deactivated. However, if you use Messenger, you can continue chatting with friends as usual, and your messages will remain in their inboxes.
Conclusion
Deactivating your Facebook account is a simple and reversible way to take a break from social media. By following the steps for your device, you can hide your profile and content while keeping your data safe for when you’re ready to return. This option gives you control over your digital presence and peace of mind, knowing you can reactivate your account whenever you choose. Your information is preserved, Messenger remains available if you wish, and you can step back into Facebook life at any time with a single login.
Frequently Asked Questions
Q: Can I reactivate my Facebook account after deactivation?
A: Yes, you can reactivate at any time by logging in with your email and password; your profile and content will be restored.
Q: Will my friends know if I deactivate my Facebook account?
A: No, your profile will simply disappear from Facebook, and your friends won’t be notified; you’ll be invisible in searches and lists.
Q: Can I use Messenger while my account is deactivated?
A: Yes, you can choose to keep using Messenger even if your main Facebook account is deactivated; your chats will remain active.
Q: How long can I keep my account deactivated?
A: You can keep your account deactivated as long as you wish; it will remain inactive until you log in again, at which point all your content is restored.


![Ailun 3 Pack Screen Protector for iPhone 15 [6.1 inch] + 3 Pack Camera Lens Protector with Installation Frame,Case Friendly Tempered Glass Film,[9H Hardness] - HD [6 Pack]](https://m.media-amazon.com/images/I/71xzYyzusvL._AC_SL1500_.jpg)


![VICSEED [No.1 Powerful Suction] [Rally Racing-Grade Stability] Phone Holders for Your Car 2025 Upgraded Car Phone Holder Mount Truck Stand for Dashboard Windshield Vent for iPhone Samsung All Phones](https://m.media-amazon.com/images/I/71TC3oUAmpL._AC_SL1500_.jpg)
