Ready to Bake? Your Guide to Cake-Making Success
Get ready to embark on a delicious journey! This guide will take you from cake-baking beginner to confident creator, providing you with the knowledge and skills to bake cakes that will impress your friends and family. Let's dive in!
Sweet Beginnings: Why This Cake Will Be Your Best Ever
Baking a cake isn't just about following a recipe; it's about creating an experience. This guide focuses on building a solid foundation of techniques, ensuring every cake you bake is a masterpiece.
- The Aroma That Fills Your Home (And Makes Everyone Happy)Imagine the comforting scent of vanilla and warm butter wafting through your home. Baking a cake transforms your house into a haven of happiness, a place where everyone feels welcome and comforted. It's a sensory experience that goes beyond just taste.
- Beyond Dessert: The Joy of Sharing a Homemade CakeA homemade cake is more than just a dessert; it's an act of love and generosity. It's the perfect centerpiece for celebrations, a thoughtful gift for friends, or a simple way to brighten someone's day. Sharing a cake you've lovingly baked creates lasting memories and strengthens connections.

Why Bother Baking? The Magic of a Homemade Cake
In a world of store-bought desserts, there's something truly special about a homemade cake. It's an expression of creativity, care, and a desire to share something delicious with those you love.
- Control Every Ingredient: From Healthy to DecadentOne of the greatest benefits of baking your own cake is the ability to control every ingredient. You can choose organic flour, reduce the sugar content, or add healthy fruits and nuts. Alternatively, you can indulge in decadent ingredients for a truly unforgettable treat. The choice is yours!
- The Perfect Celebration: Customize for Any OccasionWhether it's a birthday, anniversary, or just a simple get-together, a homemade cake can be customized to perfectly suit the occasion. Decorate it with themed icing, add personalized messages, or incorporate your loved ones' favorite flavors. A homemade cake elevates any celebration to something truly special.
The Cake-Baking Toolkit: Essential Gear & Ingredients
Before you start baking, it's important to gather the right tools and ingredients. Having everything you need on hand will make the process smoother and more enjoyable.
- Must-Have Equipment: Pans, Mixers, and More
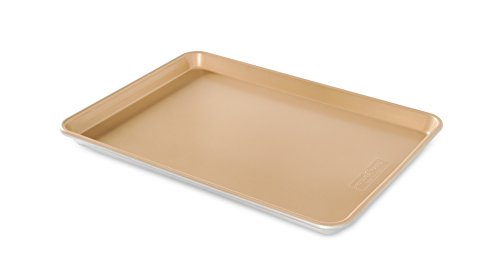
- Cake Pans:Invest in a few good-quality cake pans in various sizes and shapes (round, square, rectangular). Non-stick pans are a great option, but always grease and flour them for extra insurance.
- Mixer:A stand mixer is a baker's best friend, but a hand mixer will also do the trick. They make creaming butter and sugar much easier and faster.
- Measuring Cups and Spoons:Accurate measurements are crucial for successful baking.
- Mixing Bowls:You'll need a variety of sizes for different stages of the baking process.
- Spatulas:Flexible spatulas are essential for scraping bowls and spreading frosting.
- Cooling Rack:Allows air to circulate around the cake, preventing it from becoming soggy.
- Key Ingredients: Flour, Sugar, Butter, and the Rest
- Flour:All-purpose flour is a versatile option, but cake flour will give you a more tender crumb. Experiment with different types of flour to find your preference.
- Sugar:Granulated sugar is the most common type, but caster sugar dissolves more easily. Brown sugar adds moisture and a caramel flavor.
- Butter:Use unsalted butter so you can control the amount of salt in your recipe. Make sure it's at room temperature for easy creaming.
- Eggs:Eggs provide structure, moisture, and richness. Use large eggs unless otherwise specified.
- Leavening Agents:Baking powder and baking soda help the cake rise. Make sure they're fresh for the best results.
- Liquid:Milk, buttermilk, or water add moisture to the cake. Buttermilk will give you a tangier flavor.
- Extracts and Flavorings:Vanilla extract is a classic, but you can also use other extracts, spices, or citrus zest to add flavor.
- Cake Pans:Invest in a few good-quality cake pans in various sizes and shapes (round, square, rectangular). Non-stick pans are a great option, but always grease and flour them for extra insurance.
- Mixer:A stand mixer is a baker's best friend, but a hand mixer will also do the trick. They make creaming butter and sugar much easier and faster.
- Measuring Cups and Spoons:Accurate measurements are crucial for successful baking.
- Mixing Bowls:You'll need a variety of sizes for different stages of the baking process.
- Spatulas:Flexible spatulas are essential for scraping bowls and spreading frosting.
- Cooling Rack:Allows air to circulate around the cake, preventing it from becoming soggy.
- Flour:All-purpose flour is a versatile option, but cake flour will give you a more tender crumb. Experiment with different types of flour to find your preference.
- Sugar:Granulated sugar is the most common type, but caster sugar dissolves more easily. Brown sugar adds moisture and a caramel flavor.
- Butter:Use unsalted butter so you can control the amount of salt in your recipe. Make sure it's at room temperature for easy creaming.
- Eggs:Eggs provide structure, moisture, and richness. Use large eggs unless otherwise specified.
- Leavening Agents:Baking powder and baking soda help the cake rise. Make sure they're fresh for the best results.
- Liquid:Milk, buttermilk, or water add moisture to the cake. Buttermilk will give you a tangier flavor.
- Extracts and Flavorings:Vanilla extract is a classic, but you can also use other extracts, spices, or citrus zest to add flavor.
[image could not be loaded]
Baking Basics: Your Step-by-Step Guide to Cake Perfection
Now that you have your tools and ingredients, it's time to start baking! Follow these step-by-step instructions for cake-baking success.
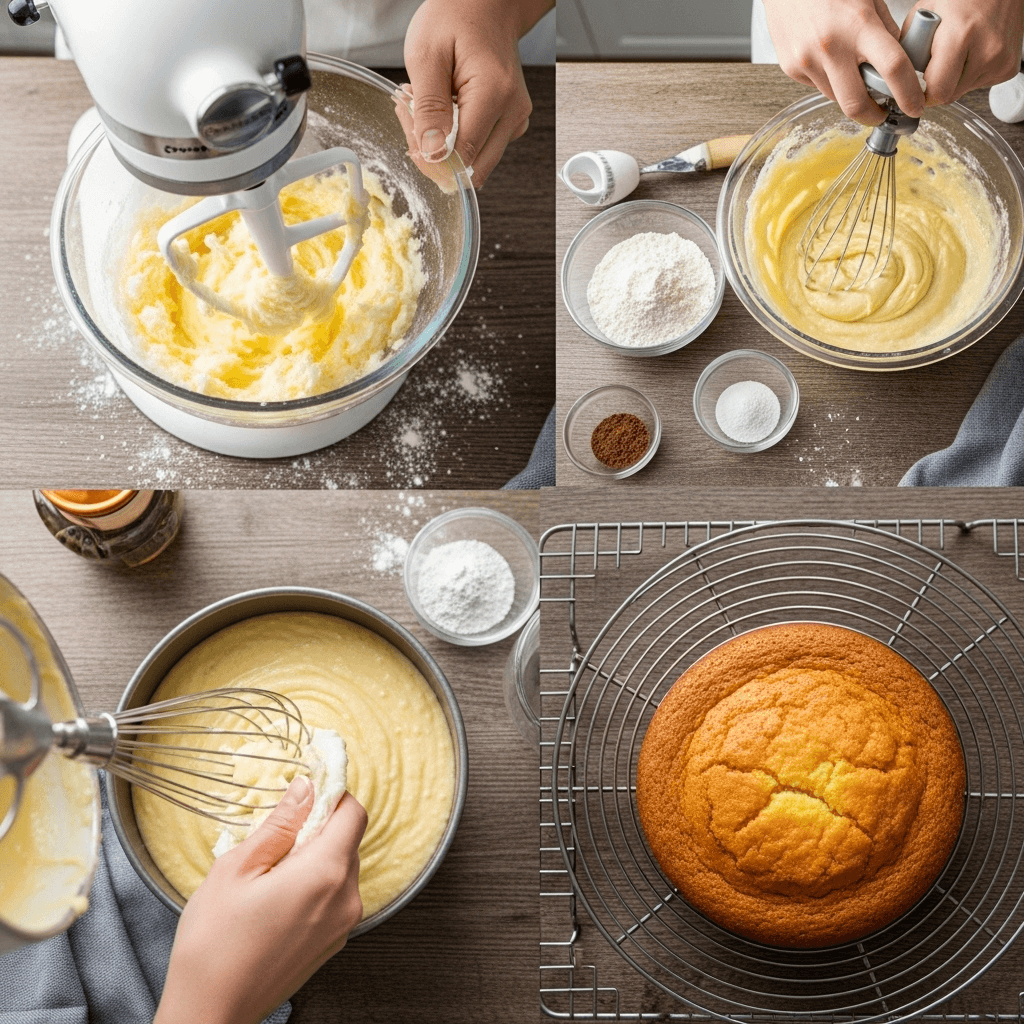
- Step 1: Preparing Your Cake Pan for SuccessGrease the inside of your cake pan with butter or shortening. Then, dust it with flour, tapping out any excess. This will prevent the cake from sticking to the pan.
- Step 2: Creaming Butter and Sugar for a Light TextureCreaming butter and sugar together is a crucial step for creating a light and airy cake. Beat them together until they are light and fluffy, incorporating air into the mixture. This usually takes 3-5 minutes with an electric mixer.
- Step 3: Mixing Dry and Wet Ingredients the Right WayIn a separate bowl, whisk together your dry ingredients (flour, baking powder, baking soda, salt). Gradually add the dry ingredients to the wet ingredients, alternating with the liquid. Mix until just combined. Be careful not to overmix.
- Step 4: The Secret to Even BakingPreheat your oven to the correct temperature. Pour the batter into the prepared cake pan and spread it evenly. Bake until a toothpick inserted into the center comes out clean. Rotate the cake halfway through baking for even browning.
- Step 5: Cooling and Removing Your Cake From the PanLet the cake cool in the pan for 10-15 minutes before inverting it onto a cooling rack. Allow the cake to cool completely before frosting.
[image could not be loaded]
Pro Baker Secrets: Tips & Tricks for Cake-Making Excellence
Elevate your baking game with these insider tips and tricks that professional bakers use.
- Room Temperature is Key: Why It MattersUsing ingredients at room temperature ensures they emulsify properly, creating a smooth and consistent batter. This is especially important for butter and eggs.
- Measuring Matters: Precision for Perfect ResultsBaking is a science, and accurate measurements are essential for success. Use measuring cups and spoons designed for baking, and level them off carefully. Weighing ingredients is even more accurate.
- Don’t Overmix: The Key to a Tender CrumbOvermixing the batter develops the gluten in the flour, resulting in a tough cake. Mix until just combined, and avoid over-stirring.
- Oven Temperature Tweaks: Know Your OvenOvens can vary in temperature, so it's important to get to know yours. Use an oven thermometer to ensure accurate temperature readings. You may need to adjust the baking time or temperature slightly depending on your oven.

Beyond Basic: Creative Cake Variations to Wow Your Guests
Once you've mastered the basics, it's time to get creative and experiment with different flavors and ingredients.
- Adding Fruit: Fresh, Dried, or CandiedIncorporate fresh berries, sliced apples, or chopped bananas into your cake batter for a burst of flavor and moisture. Dried fruits like raisins or cranberries add a chewy texture. Candied fruits add sweetness and color.
- Chocolate Dreams: From Dark to White and Everything In BetweenAdd cocoa powder to your cake batter for a classic chocolate cake. Use melted dark chocolate for a richer flavor, or white chocolate for a sweeter treat. Chocolate chips or chunks add texture and indulgence.
- Spice It Up: Cinnamon, Nutmeg, and Other Warm FlavorsEnhance your cake with warm spices like cinnamon, nutmeg, ginger, or cloves. These spices add depth and complexity to the flavor, creating a cozy and comforting cake.

Cake Catastrophes: Common Mistakes & How to Avoid Them
Even experienced bakers make mistakes sometimes. Here's how to troubleshoot common cake-baking problems.
- Cake Sticking to the Pan: Preventative MeasuresAlways grease and flour your cake pan thoroughly. Use baking parchment to line the bottom of the pan for extra insurance. Let the cake cool slightly before inverting it onto a cooling rack.
- Dry Cake Woes: Causes and SolutionsOverbaking is the most common cause of dry cake. Use an oven thermometer to ensure accurate temperature readings. Adding extra moisture to the batter, such as sour cream or applesauce, can also help.
- Sinking in the Middle: Addressing Uneven BakingUneven baking can be caused by an oven that's not properly preheated or by opening the oven door too frequently. Make sure your oven is at the correct temperature before placing the cake inside. Rotate the cake halfway through baking for even browning.
Cake Confidence: Celebrate Your Baking Victory!
You've baked a cake! Now it's time to enjoy the fruits (or rather, cake) of your labor.
- From Kitchen to Table: Enjoy the Sweet RewardsFrost your cake with your favorite icing, decorate it with sprinkles or fruit, and share it with your loved ones. Enjoy the sweet taste of success!
- Baking is a Journey: Keep Learning, Keep BakingBaking is a skill that improves with practice. Don't be discouraged by mistakes. Learn from them and keep baking. The more you bake, the better you'll become.
Cake FAQs: Your Burning Baking Questions Answered
Still have questions? Here are some frequently asked questions about cake baking.
- Can I substitute ingredients in a cake recipe?
- [Placeholder Answer: Substituting ingredients can sometimes work, but it can also affect the texture and flavor of the cake. If you're new to baking, it's best to stick to the recipe as written. However, if you're experienced, you can experiment with substitutions. For example, you can often substitute applesauce for some of the oil or butter to reduce the fat content. Always research the potential effects of the substitution before making it.]
- How do I know when my cake is done baking?
- [Placeholder Answer: The most reliable way to check for doneness is to insert a toothpick into the center of the cake. If the toothpick comes out clean or with just a few moist crumbs attached, the cake is done. You can also gently press the top of the cake. If it springs back, it's likely done. Be careful not to overbake, as this can result in a dry cake.]
- How long does homemade cake last?
- [Placeholder Answer: A homemade cake will typically last for 2-3 days at room temperature, or up to a week in the refrigerator. Store the cake in an airtight container to prevent it from drying out. Frosted cakes are best stored in the refrigerator.]
- What's the best way to store a baked cake?
- [Placeholder Answer: The best way to store a baked cake is in an airtight container at room temperature or in the refrigerator. If you're storing a frosted cake, make sure the frosting is set before covering it. You can also freeze unfrosted cake for up to 2-3 months. Wrap the cake tightly in plastic wrap and then in foil to prevent freezer burn. Thaw the cake completely before frosting.]
- [Placeholder Answer: Substituting ingredients can sometimes work, but it can also affect the texture and flavor of the cake. If you're new to baking, it's best to stick to the recipe as written. However, if you're experienced, you can experiment with substitutions. For example, you can often substitute applesauce for some of the oil or butter to reduce the fat content. Always research the potential effects of the substitution before making it.]
- [Placeholder Answer: The most reliable way to check for doneness is to insert a toothpick into the center of the cake. If the toothpick comes out clean or with just a few moist crumbs attached, the cake is done. You can also gently press the top of the cake. If it springs back, it's likely done. Be careful not to overbake, as this can result in a dry cake.]
- [Placeholder Answer: A homemade cake will typically last for 2-3 days at room temperature, or up to a week in the refrigerator. Store the cake in an airtight container to prevent it from drying out. Frosted cakes are best stored in the refrigerator.]
- [Placeholder Answer: The best way to store a baked cake is in an airtight container at room temperature or in the refrigerator. If you're storing a frosted cake, make sure the frosting is set before covering it. You can also freeze unfrosted cake for up to 2-3 months. Wrap the cake tightly in plastic wrap and then in foil to prevent freezer burn. Thaw the cake completely before frosting.]